npm自定义包发布
本文以自定义工具函数库为例,讲解工具包项目从发布到 npm 中央仓库、维护及使用的过程。

项目准备
创建工具包项目
安装 Node 和 Git
检查是否已经安装 node(node 中自带 npm)
1 | # windows:cmd命令 |
如果 node 与 npm 命令不识别,说明你尚未安装 node;或者者未配置环境变量,导致当前路径下无法识别命令。安装 node,自行解决,这里不再赘述。
Git 的安装自行解决
创建项目
1 | # 创建一个空的项目文件夹:huatree-utils |
npm 命令,详见官网
yarn 命令,详见官网
初始化 git 和配置忽略项
1 | # 初始化 |
项目根目录下创建.gitignore,配置如下
1 | .DS_Store |
下载依赖包
1 | npm i webpack webpack-cli -D |
配置 webpack
webpack.config.js
1 | const path = require('path') |
在入口 JS 中导出功能
src/index.js
1 | export function test() { |
配置打包命令
package.json
1 | "scripts": { |
项目进行打包
1 | npm run build:watch |
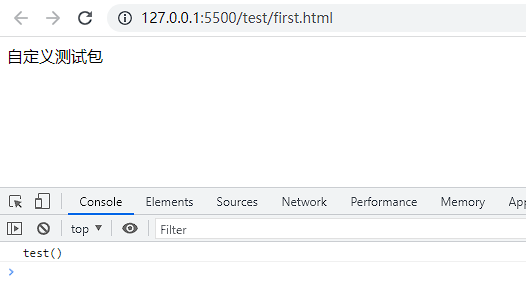
测试使用自定义包
test/first.html
1 | <body> |

发布流程
完善 package.json
name:必须是唯一的名称(在 npm 在线中央仓库中没有同名的)
main:必须指定为打包生成的 js 文件
keywords:指定一些方便别的程序员搜索到当前库的关键字
1 | { |
!
关联 github、填好作者、协议、项目描述、版本。
注意项目根目录带上 README.md 使用介绍。
了解package.json文件更多配置信息,详见
npm 配置
npm 配置的中央仓库不能是淘宝镜像
发布前必须执行:
1 | npm config set registry https://registry.npmjs.org/ |
不用发布时:
1 | # 淘宝镜像url可能有改变,根据实际情况使用url |
查看配置:
1 | npm config list |
注册 npm 中央仓库账号
注册地址,详见
关键信息:用户名、密码、邮箱(需要验证)
添加用户
执行
1 | npm adduser |
登录 npm 仓库:依次指定用户名、密码、邮箱
密码输入过程不可见
下次登录的时候,可能会输入验证码,验证码会通过输入的邮箱发送。
发布仓库
执行
1 | npm publish |
如果发布失败,出现 npm 403 错误,一般是库名已存在(重复了),修改 name 为唯一值,再发布。
仓库维护
更新代码后再发布
修改项目库的版本号:package.json 中的 version,例如从 1.0.0 改为 1.0.1。
! 版本号注意一定要变大
修改代码后重新打包、发布
1 | npm run build |
强制删除已发布的库
! 72 小时内可删除,超过则无法删除
登录情况下执行
1 | npm unpublish --force |
使用自定义工具包
下载工具包
1 | # 名称是你前面指定发布的库名(位于package.json中的name参数) |
网页中引入并使用
1 | <script src="./node_modules/ht-utils/dist/huatree-utils.js"></script> |
模块化引入并使用(ESM 方式)
1 | import { test } from 'ht-utils' |
模块化引入并使用(CommonJS 方式)
1 | const { test } = require('ht-utils') |
取消发布
发布的包(如A)72小时内,可以取消发布(从注册表中删除包)。取消发布后,如果需要再次发布此包,需要使用新的版本号,并且24小时后才可发布该包的任何新版本。
包重命名
采用弃用包的某个版本方案解决。
没有任何专用的方法可以做到这一点。一种常见的技术是使用 npm-deprecate 来给出一个警告,指示新的包名称。
1 | npm deprecate my-project-name@"<= latest-version" "This project has been renamed. Install using new-project-name instead." |
例:
1 | npm deprecate my-thing@"<= 0.2.3" "This project has been renamed. Install using my-new-thing instead." |
issues
引入ht-m-utils报错:ReferenceError: self is not defined
ht-m-utils项目中,需修改配置webpack.config.js,加入globalObject: 'this'
1 | module.exports = { |
Warning: To load an ES module, set “type“: “module“ in the package.json or use the .mjs extension
如果项目中没有配置ES6的ESM转ES5,引入ht-m-utils运行时,会出现这个问题。
解决方案:配置ES6转ES5,或者package.json加入"type": "module",以便支持ESM
相关链接
[2] Web 前端自定义工具函数库
[3] Renaming a published NPM module
[4] npm-deprecate